Sunday 29 January 2017

Trying to be creative for Darnell's NBUS #9

Tonight is the closing of week two at Darnell's NBUS Challenge #9.

NBUS stands for "never before used schtuff". Darnel is also celebrating 1000 posts, over 1000 followers and has fabulous prizes on offer. You can still join in, as this is part of three weeks of celebrations over at Darnell's blog. Go to  djkardkreations blog to enter or just to check it all out!

My NBUS item on this card is the Inkadinkado Christmas Silhouette stamp. Although I have previously posted a card with this stamp, it was with a borrowed stamp. At one of the garage sales last summer, I managed to snap up this set of stamps, still in the package, for $2.00.  Oh my!


My other NBUS items are the Yupo paper, as well as the Citrus and Mermaid alcohol inks which I used to create my background.

This card is a bit of a twofer in the optional card category. I was trying to CASE Darnells Blog Header, and wanted to add a Bokeh look.  I cased that idea from  Jane at Jane's Journal Blog.
Here is a photo of her background.


 I decided to only ink over 3/4 of my yupo page, thereby leaving enough faded out inking with even a bit of the bare page for my Hidden Word.

I inked my Yupo and did not quite manage to get Darnells Blog Topper look as this is the first time I have ever used Alchohol inks on my own. I did make a card topper in a class a couple of years ago, but it was not on Yupo. It was a lot of fun and I now want to make more backgrounds to have on hand!

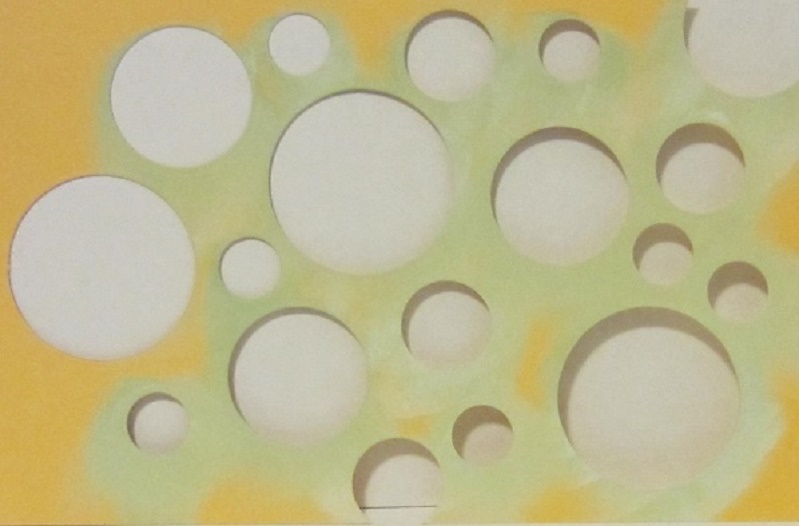
I made a stencil from some heavy weight card and die cut a swirl of different sized circles for the Bokeh. I stencilled the circles over the inky Yupo with Prima Ingvild Bolme Pastel Yellow Chalk Ink to create the bokeh look.


After that was dry, I stamped the Angel with Momento Black Ink and Sprayed the whole topper  with Imagine Crafts Sheer Shimmer Spritz.  I was horrified to find the black ink ran over the page. I tried to control it with the edge of a sheet of paper towel and then realized that the ink was just wiping off!

So...I used a Lysol wipe as it was the only thing I had on hand that was damp, and I wiped off the card...oh my! I did take off quite a bit of lovely colour I had created on the yupo... I was left with a sort of shadow of the angel...sort of a light grey. I then very carefully restamped the angel image with Versamark and used Stampendous Marcasite Opaque glitter to add some sparkle.  There is the teensiest hint of a shadow around the halo and the wings...oh well...


I could not get the black embossed powder to dry properly. I did not want to get too close to the Yupo as I had already managed to warp another piece of it earlier. I finally gave up and hairsprayed the whole topper, thereby sealing in the embossing powder...sort of like setting glitter!

I cut the Crafty Cuts NOEL die from the snippet of inky Yupo that was left over, and mounted it on pop dots for some depth to help it stand out from the page.

All in all, this card was a lot of fun to make. Defo a learning curve to the Yupo and now I want to watch some U-Tube tutorials on how to best create with this fun product.

PS  I just set my card up to photograph and I see that hairspray does not hold embossing powder! I managed to touch the snowflakes around the Angel's horn and the black powder came off on my fingers...leaving the greyish smudge where the old image used to be,,,Ugggh... I have stamped
a couple of wee snowflakes to try to cover it up somewhat, but will post this anyways...

Saturday 28 January 2017

A CASE Card

Finally made my Christmas card for the Rudolph Days Challenge. My old and new Design Team members made such gorgeous cards for my Jan 25th post, that I decided to hold off on posting my own card. There is plenty of time to get creative yourself as you have until midnight on the last day of the month to enter your Christmas card or project...

I made this card to participate in Darnell's 9th NBUS Challenge .  Darnell is running three back to back challenges celebrating 5 years of blogging, her 1,000th post and over 1,000 followers. The prizes are fabulous and you can enter three times each week.

The entries must of course be NBUS (never before used Schtuff) but there are optional themes too. One of this weeks optional themes is to Case a card and the other extra theme is to use a partially hidden sentiment. You can check out this challenge and the rules for it, on her blog djkarkreations 

I CASE'd my card from Brenda at Floral Fantasies. Here is a photo of Brenda's card...


I first cut a a piece of ugly heavy weight card stock into a 5 1/2 x5 1/2 square . I drew a line down the middle of the square at the vertical half way mark. I then used this pencil line to keep my Memory Box Drop Ornament die centered and straight. I taped this homemade stencil to my craft mat at the top and bottom and the right hand side. I used the opening on my left to slide my card under the stencil, and used Prima's Ingvild Bolme Pastel Brown chalk ink to shade the ornament shape onto my card.


I wished I had a larger bauble die as I only had a couple of image choices due to size restrictions!
Stamped my PSX F323 Peace on Earth stamp with Momento Brown and coloured it with Pencil Crayons and gamsol. This is a very old stamp...it says 1988 beside the manufacturer!
I bought this stamp at one of the papercraft stores garage sales. Although I have had it for quite some time, I had not used it yet...clearly a NBUS item!


I then slid the card back under the stencil and sprayed the ornament area with Imagine Crafts, Sheer Shimmer Spritz. I was a little too close and got a couple of large drops plus a sort of washed out area on the right middle, so I let it dry and resprayed, concentrating on the left this time. Seemed to even it out somewhat.

I had a sentiment all picked out and had placed the ornament to allow room for it. Then I realized that the stamp has the sentiment built right into it! So I added some  Mariane corner dies in shimmery brown pearlescent cardstock and made the bauble topper from the same paper.

If I was to do this card style again, I would make it at least 6x6 and use the larger bauble dies that are free to use at my local papercrafts shop. That would give me more choice for images.

I am entering this card in the following challenges:

1. Darnells' 9th NBUS Challenge @ djkardkreations - must be NBUS with optional themes of CASE and partially hidden sentiment (my card is CASE and NBUS item is my stamp).

Wednesday 25 January 2017

January, 2017 Rudolph Days Challenge

Welcome to the start of a new year creating our Christmas cards and Christmas themed projects, year round. This takes the pressure off finding time to make them at the last minute! The Christmas season is busy enough without making it more so with needing to carve out time for creating cards and gifts.

The Rudolph Days Challenge runs from the 25th of each month and runs till midnight on the last day of that month. You can submit any Christmas themed card, tag, or project. I always look forward to viewing your creations and I have had fun shopping for the prizes for this year!

Here are the rules for your perusal.

1. The Rudolph Days Challenge will start each month on the 25th, and will close at midnight PST, on the last day of that month.
2. The theme is always Anything Goes, as long as it is Christmas.
3. One entry per person and you just need to enter one Christmas card or Christmas project.
4. You may combine your entry with other challenges (maximum of 10 in total).
5. Your card (or Christmas project) should not have been previously posted to your blog. It should be posted to your blog during the current months Rudolph Days Challenge, (between the 25th and last day of the current month)
6. Please link back to or at least mention, the Rudolph Days Challenge.
7.  Prizes will be shipped anywhere in the world.
8. The winner will be selected by random draw and announced on the first day of the following month.

It is a new year and as alway, new years bring new changes. I am pleased to announce the Rudolph Days Challenge Design Team for 2017.

This year, I took all last years design team members names and placed them in a hat. I then drew out 4 names to make up this years team.  The 2017 Rudolph Days Challenge Design Team members are:

Team A:  Jenny L of Cardsarus  Jenny has had a pretty, country Christmas scene. I like the non traditional colours and the eye catching image.


Sam/Whisper of Whispers Cards  Sam has made this adorable slider card. I have not made one of those in years and now I so want to try one again!


Team B is made up of Linda @ Snails Space and Dr Sonia of Cards, Crafts, Kid's Projects 
They will be designing every other month of 2017.

Because we do not run our challenge in December, we have the added bonus that some of our 2016 design team finish up their year this month! So this is a month packed with inspiration!

Gloria Lee @  Gloria's Craft Room  has made this wonderful watercoloured snowflake card. I love the fresh feel of these gorgeous colours.


Donna @ Indiana Inking. has made this adorable fairy card with such a pretty embossed background..


Shaz @ Calligraphy Cards - Shaz in Oz     has made this beautiful embossed snowflake die card. Check her blog for the details of how she made this pretty card.

.
I wish to heartily thank all the members of my 2016 Design Team.  These ladies were a godsend. They were reliable, helpful, and always on time with their commitments. If there is anyone looking for design team members, I strongly recommend them!

As this is such a long post this month, I will go straight to the prizes. This year I will always offer a choice of a stamp or a die.  That way, anyone who does not use a Big Shot or Cuttlebug will still have a choice of a prize!  Best of all, we will have an extra prize this month. Just a little something extra to make you want to drag out your Christmas supplies!

First winner has a choice of this Memory Box, Reindeer Scalloped Circle Frame die


or this Wild Rose Studio, Penguin With Present stamp


Second winner will receive this  Hampton Art 6 piece stamp and tag die set


or this Stampendous, Snowman with Tree stamp


Monday 23 January 2017

Quick reminder of the January Rudolph Days Challenge.

Just a quick reminder that the January Rudolph Days Challenge is fast approaching. This month I will be giving away an extra prize...just to help inspire you to drag out your Christmas supplies and get creating!

Sunday 22 January 2017

Christmas Card Club Jan 22 - Star Of Wonder

I chose the theme of Star of Wonder (or Any Stars), for this fortnight's theme at Christmas Card Club.
I had a bit of a selfish reason for choosing this theme as I wanted to use one of my brand new dies. This one is a Sue Wilson Festival Collection, Wise Men Mini Striplet.

I kept my card quite simple as I wanted the die to be the focal point. I just used some starry vellum with a piece of turquoise card behind it to create a night sky for my background. I made a pencil mark where my die was going to be placed and taped the vellum to my card with two long strips that are now hiding behind the diecut scene.

While I still had the snippets basket out from my last post, I rifled through it and pulled out some glittered papers. Can you see them in the large basket? The black glitter is the large angled piece to the top right of the basket. The others are hidden where the glare is really bad...just below the black...


 I was able to cut the Wise Men die from a snippet of black heavy glitter card and then cut it again again from a  snippet of gold finer glittered card. There is a rectangle die for the background and I used a snippet of aqua finer glittered card. I slid the aqua behind the black silhouette and trimmed up the the gold to slide behind where needed.


This die is just too intricate to inlay everything back in so I just inlaid the gold North Star and the gold larger piece behind the Wise Men.

I found the layers of various coloured glittered card sort of showed along the outside edges, so I took a black sharpie and ran it around the outside edges to hide the layers a bit more.

The sentiment is a Tim Holtz Holiday script made by Sizzix. The black glittered card was just too thick and heavy to use for this slender sentiment so I found a snippet of dark charcoal grey that is the finer glitter like the aqua and gold. It slid out of the die like butter and I used a glue pen to attach it.

The vellum was a bit too flappy on the right hand side so I very carefully flipped the card over and sort of lifted it to expose the back of the vellum. I used the glue pen to place a teensy dap of glue behind the larger stars. To hide the glue drops from showing, I added a wee rhinestone to the fronts  of those stars.

I think if I make this card with heavy glittered cardstock again, I would hairspray the silhouette as soon as I cut it out. I feel that I knocked a lot of glitter off the bottom part from all the handling of it, when I was creating the hidden gold layers.

You can find the other ladies cards if you click on their links (on my right sidebar). If you are interested in joining our club, send me an email at Scrappymo1@gmail.com
We make a Christmas card each fortnight and take turns choosing the themes. Having your cards already made really takes the pressure off in the leadup to Christmas.

I am going to enter this card in Darnell's NBUS Challenge #8. NBUS stands for Never Before Used Schtuff, which my Wise Men die certainly is!  Darnell coined the phrase (and many others) and has a fabulous celebration challenge going on over at her blog   djkardkreations. You can see the link also on my left sidebar.

Saturday 21 January 2017

This one's for Darnell's NBUS

Darnell at djkardkreations is having another NBUS Challenge. NBUS stands for   Never Before Used Schtuff. You can read all about it here.

My NBUS item is the 6x6 inch wood grained card base I made for this Thinking Of You card. My card base started its life as a 12x12 sheet of very heavy weight DP that came in a DCWV DP paper pad.  It is heavier in fact, than most cardstock! I cut every sheet from the pad in two and then scored and folded each one to create a variety of  6x6 cards.

I already had my Thinking of you image stamped on kraft card and coloured with an assorted variety of pencil crayons...just regular cheap kids pencil crayons,blended with paper stumps and Gamsol.

I also wanted enter my card  over at Di's Pixies Crafty Workshop. Di has recently revamped her rules to allow for a two week challenge, with one entry per person. Di's challenge is so much fun and to celebrate her "revamp", I am going to try to make my entries over there true snippets cards. In other words, cards that are made completely from snippets, other than the base card and envelope.


With this in mind, I rifled through my DP snippets collection and pulled out three clear envelopes full of possibilities.  I pulled out a fairly large piece of Echo Park Style Essentials brown damask, and chose some smaller snippets for the fishtail banners. The green striped DP is AC Merry, the blue starry snippet s is Bo Bunny Dear Santa, and the green starry DP is Doodle Bug Here Comes Santa Claus.  Now I know this  isn't a Xmas card, but I liked these colours and stars can just be stars, methinks!
                            

Even the beige shimmery mat is a snippet. I had quite a time figuring out the manufacturer but think it is from a DCWV neutrals mat stack, as it is adhesive ready...just pull off the backing and voila!

I did add a little clear Gelly Roll pen over the North, South, East, West  to the right of the tree, and then dabbed a few dots here and there amidst the branches.


I tied a some brown jute around the banners, added a trio of jewels, and called it a day.

I am entering this card in the following challenges:

1. Darnell's NBUS Challenge #8 - use a |NBUS item & optional theme of use coloured pencils on kraft
2. Pixies Crafty Workshop - must use snippets
3. Crafty Calendar - Something New ( my 12x12 paper pad which I cut up into 6x6 cards)

Monday 16 January 2017

Peace On Earth


Do you ever fel a wee bit behind the 8 ball?

Dec 1st arrived and I was faced with the looming Canada Post deadline to mail off my overseas christmas cards.  At this late date I realized that once I sent the overseas cards off,  I did not have enough cards left to send locally to my family and friends. I cast my mind over my on hand supplies and tried to chose a design that would make up easily into multiples.

I wanted to make a dozen in total, so I chose a prefolded set of silver glimmer cards that I bought a couple of years ago. I think they were only 5x5 inches so  my choice of stamp was limited by size requirements. Luckily I already had 6 stamped images of this Nativity scene ornament, so I quickly stamped 6 more and then cut them with a Lawn Fawn Stitched circle die.

I painted the blue background with twinkling H2O's, and used a Silver Gelly roll pen over the bauble fastener at the top. I had some sheets of Silver fine glitter paper from one of the papercrafts garage sales I attended last summer, and cut them with a Spellbinders scalloped circle die.

I am upstairs at the moment, and the sentiment stamp is down two flights of stairs in my craft room...sorry I do not remember the manufacturer...


After I took this photo, I decided that the card looked rather plain, so I took the silver Gelly Roll pen and carefully went over all the scrollwork around the nativity scene! It went surprisingly fast and I wish I had remembered to retake the photo.


Sunday 8 January 2017

January 8, 2017 Christmas Card Club -Anything Goes

Margaret at Dutchess blog, picked the theme for this fortnights Christmas Card Club.
She chose Anything Goes, so it was the perfect chance to open one of my new NBUS Penny Black Stamps and give it a try!

I think this stamp was designed for watercolours but I substituted Tim Holtz inky stains as I only have watercolour pencil crayons.  I dabbed the stains on my craft mat and then picked them up with a paint brush and painted the ink onto my stamp.

It was a bit hard to get the green to cover evenly as the rubber branches are so finely cut. I got the green and red a bit sloppy on my first card and then managed to get a faint hint of green and even some red just below my image.. Must have been on my hand...

Then I stamped the PB greeting that came with the stamp and managed to get an inky line from the edge of the rubber. Note to self...check the edges before stamping!

I used another NBUS item The silver cards were on clearance at Michaels for 99 cents. They were designed to slide a photo in them. The card I stamped my image onto was a lot heavier weight than a photo. It caused the mirri card to sort of look indented from the thickness of it.

I tried to center the image within the mirri frame as best I could and then took my finger and evened out the indented bit to look like it was supposed to be like that. Unfortunately my nail made a sharp crease in the mirri frame! Ugggh...

A couple of red snowflakes were carefully placed to hide the mistakes and I quickly made a second card, avoiding all the previously mentioned mistakes!


I used yellow stickles for the stamens of the poinsettia, and added a bit of stardust stickles to the leaves and petals.

Just behind on the left, you can see the first attempt...and just behind on the right, I have made a third card. Wherever possible, I am going to try and make some multiples this year.


Recipe
Silver Mirr cards and envelopes - Michaels after Xmas clearance
Stamp - image and sentiment are Penny Black Fire Star
Cardstock- had to use a snippet of Bristol vellum paper as I could not find my watercolour paper. Only had enough paper for 3 cards though.
Inks - Tim Holtz lipstick red and  bundled sage green
Stickles - yellow stickles for poinsettia centers and Stardust stickles for image

I am entering this card in the following challenges
1. Simon Says Stamp Wednesday challenge - Something New (my stamp) ends Wed Jan 11
2. Pixies Crafty Workshop - must use snippets
3. Penny Black Saturday Challenge - Anything Goes ends Jan 31

Wednesday 4 January 2017

A Couple More

Here is the last of my 2016 Christmas cards.

My first card is another from the Hobby House pre coloured image card series that I posted a few days ago. Same DP (First Edition) and border trim (K & Co),  just a slightly different embellishment design.


The second card is another one made at Langley Stampers Club. The die cut like butter and just slid through the gold mirri card.  I saved the center castoffs from the snowflake rings and thought I would punch them into snowflakes for future use. Mirri card is so expensive that I hate to throw any of it away!


Since that is the last of my 2016 Xmas cards, that means I had better get to work creating new ones for 2017! I have so many new Christmas themed dies and stamps that I am looking forward to use. I am going to try to use my new stash on all my Xmas cards this year.

Sunday 1 January 2017

Church Spires


A couple of years ago, I bought a stack of this red, green and white 12x12 DP in the after Christmas sales.  I think they were 3 for a dollar!  I cut it up into 6x6 sheets and stored it away for Christmas cardmaking. The colourful stripes are heavily glittered and it never seems to require a lot of embellishments as it is so strong on its own!

I think this is the last time I shall use this Church Spire stamp.  It is hard to use as the church and spire are on an angle and do not stand straight like the trees. I always angle the stamp towards the left when I stamp it and that way I try to "correct" the off kilter look.  I think it is a pretty stamp as it reminds me of the church spires you see when you take a train across Canada. Especially in the Eastern provinces. The church spires are the first thing you see in the distance. Before the village or the town, you see the spires standing so proudly. Such a delight!

But I have received enough new stamps this Christmas, that I think I shall retire this one!


I painted the trees with Twinkling H2O's in three shades of green. I went over the church spire with a Sakura Jelly Roll pen in silver.

I tried something new for the snow. I painted smatterings of a heavy weight glue on the branches and the ground and sprinkled pearl glitter over it and left it overnight to dry.  Quite a bit came off in the morning, but I was pleased with the final look of it.


The Noel stamp is an unknown as it got separated from the package a few years ago! It fits the Stampin' Up oval and scalloped oval really well. I made up a few of these from some snippets, just before Christmas.  I tend to use the same 12 Bazzill heavy weight card for my mats and trims and there is just one red shade, so it is safe to die cut or punch ahead from the snippets. It always matches!

I am entering this card in the following challenges:
1. Pixies Crafty Workshop - must use snippets (till Jan  7th)
2. Sparkles Christmas Challenge - lots of glitter (till Jan 30th)
3. The Ribbon Girl - 1st Sunday Challenge Anything Goes (till Jan 14th)